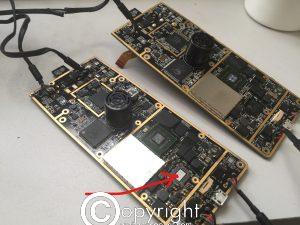
Bebop 2 Repairs Continued

Well I had to say fairwell to the motherboard!

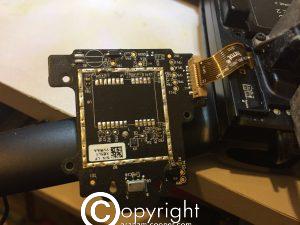
Sadly there was another short around the CPU area and the Power management chip had also failed on this board.

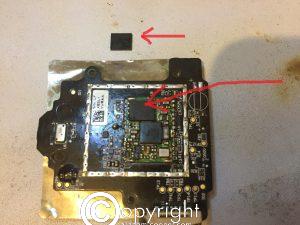
After removing the underfill around the chip, it was removed and there was some corrosion under the chip.

Sadly I had to give up on this motherboard as there was a good chance there was more damage with the remaining chips.

So I moved onto a spare board I had which was also faulty, but a very easy repair in that this other one just needed a new motor wire and a wifi sma plug soldered back onto the board, which was taken from the water damaged board.

So now onto putting the board back in the Bebop 2 along with the original water dipped main camera, motors , downward facing camera and gps board and motherboard fan.

On power up the red led on back just flashed and there was no motor esc sound or the board fan spinning.

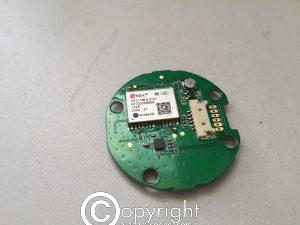
To cut a long story , I found there was a short on the UBlox chip , the vcc power line was short to ground. Hence as the bebop needs to read the barometer from the gps board and it could not, the board would not boot.

So I did wonder what would happen if I removed the GPS chip?

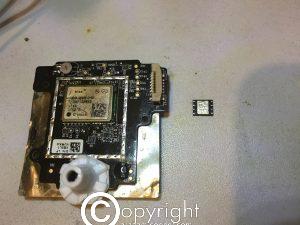
So I removed the chip, and plugged the GPS board back into the bebop and it did indeed boot with the esc sound and also the motherboard fan spinning and going from flashing led to solid.

I could connect via wifi to the Bebop and the main camera was working fine!

I kinda felt that might be toast, but was working fine , as was the other original water dipped parts.

I then tried out a test flight which it took off and held hover via position hold from sonar and downward camera indoors well.

I was not sure whether with no GPS chip, it would work to be honest.

But I guess with no gps chip, the bebop just checks for GPS signal and with no chip it assumes inside with no satellites etc.

This test was also done with a mod I had done to the original damaged lipo cells and that was replacing them with 3 x 18650 Samsung 25R INR18650-25R.

For my next test , I tried outside and the flight time from 100% to 0% landing was around 14mins.

A video I made is below.

To to recap, to get this salt damaged Bebop 2 working again needed :-

full set of motor bearings

Main board

GPS board

Battery

So if one was buying new parts = uneconomical repair! Just buy a new one!

However……

I was lucky enough to have another faulty main board , but not to much effort to repair.

Also I am running the GPS board without the Ublox gps fitted.

My next steps with this will be to try to fix the GPS board and also test out some new LG 3000mah 18650 cells as a flight pack.

More soon.


Posted in Bebop 2 | Leave a comment

More Dead Parrot Bebop 2 continued

Well being a glutten for punishment, I have all 16 mosfets for the main board on there way to me. The postage and customs and UK VAT cost the same as the parts! As could not source them all in the UK.

Curious to see if replacing all these brings any of the board back to life.

Will update with progress or lack of when I get and fit them back 😉

Next while I am waiting as I will clean up the old ones to read on a meter see if any obvious internal shorts on the original fets.


Update:-

Tested the SIZ342 Power Mosfets and 4 of the original 12 are reading short circuit.


Posted in Bebop 2 | Leave a comment

Dead Parrot Bebop 2 continued

After slowly ramping up to a normal voltage of 12 volts to the board the mosfets down the bottom of main board got really hot, so must be a short there and most likely on the others too as well as maybe internal short on chips or through multi layered pcb.

So with a short on the main board and how badly corroded the mosfet area was, I decided to remove every mosfet!

1  Z342 missing from above photo, there should be 12 of those.


As you can see a lot of the above had a lot of corroded/Missing pads.

Once this was done , no short and connected the 12 volt input and nothing was getting hot.

Although with no power mosfets in , not much going around the board anyway.


A lot of corrosion on the pcb pads, maybe with some flux and tinning area can clean the pads back up without having to make jumper wires up 😉

(The 2 red wires were just in place of the normal lipo connector as this was weak not being in shell and also getting in the way to measure voltages etc)

The Motor pre driver chips of which there are 4 on the board are MPS MP6530 (Three – Phase Brushless DC Motor Pre – Driver)

And the other power mosfets which there are 12 of them seem to be Vishay SIZ342 (DUAL N-CHANNEL 30-V)

Best way forward now?

Use as spares…..

If I get bored , I might for a laugh get new mosfets and fit them back just to see if anything happens.

But with corrosion around wi-fi chips and other exposed chips , almost certainly replacing all the mosfets will not bring this back to life, just too far gone.

But intresting to see just how much damage will happen if electronics on a quadcopter like this will take if it lands in water, especially salt water as this one did and more so if just left to dry out.

Think twice if you ever offered a water damaged quadcopter, the machine will 9 times of 10 need at least a new main board at the very least….

I may use the shell with new bearings in the motors with something like a naze32 or pixhawk board in the future.


Posted in Bebop 2 | Leave a comment

Parrot Bebop 2 landed in the sea

Got hold of a damaged Parrot Bebop 2 , suffering from landing in the sea.

Judging by the state of the boards and motors, I assume its been sitting around after it’s dip in the sea for quite some time.


First thing was to totally strip down everything and then wash all the boads and let them soak in warm distilled water to try and disolve the left over salt water damage.

Then after this was to dry the boards off and them drop them in isopropyl for a few hours.


After this, let the boards dry out and then inspect and still parts around some of the smaller chips that had bad corrosion.

Used a small brush and a combination of switch cleaner and then washed the main board again with washing up liquid and gently rubbed away and then dryed and back into the isopropyl for a while.

Then coated the bad areas around the corroded chips with some solder flux as that may help and then will probably use a heat gun and more flux to clean the chip up.

But at present it looks so fragile, that part can wait while I check the board for shorts.

The battery on this was left plugged in, which is a shame the previous owner did not leave it removed.

The board had a short on the incoming main power line, and the lipo that came with it was totally reading 0 volts.

At this stage, looking like it will need a new main board which is uneconomical of course as the board is like £249.99 in the uk or $324.99 in the USA.

Also all the bearings on the motors are gone and 2 motors the bearings totally seized and so they would also need to be replaced and those motors should be fine.

But as the main board is pretty much a trash job, it cant do any more harm to have a play!

So first off wanted to see if I can get some clue where the sort was so connected up a small 1.2volt battery to main board input and quite quickly drained that down. Not enough current for anything to get warm.

Then applied 2.4 and then 3.6 and killed them pretty quick, these were only normal dry cells.

So next connected up a 18650 battery at 4.1 volts charged and it was only slighty draining down, but done a few measurements and had that 4.1 volts at 3 of the 4 motor wires.

I am fully expecting the mosfets to have died landing in water.

I dont know history of why it landed in the water, I presume low battery and it when into auto land.

Thats as far as I have got thus far into this experiment.

4 motors are salvageable once new bearings fitted.

Just looks wise the gps board looks like it might be okay as no corrosion on it( I did remove the small backup battery on it)

The main Camera looks sealed and maybe water did not make it into base, but have to assume theres a good chance that is history too.

Downward facing position hold camera again looks ok, but again have to assume it trash.

The ribbons on the board connecting various items all badly corroded.

All in all this confirms what we already really know, if a quadcopter lands in water and even more so salt water, you have to get the battery out ASAP and DO NOT leave the quadcopter to dry out.

You must either strip it down and wash it with distilled water and dry and clean off or get it someone who can do this for you.

Leaving it as this previous owner did will pretty much write off the chance of repairing it at a cost effective price.

Now I am going to ramp up the current to see what gets hot……

Happy flying….


Posted in Bebop 2 | Leave a comment

18650 batteries in a AR Drone 2.0

Decided to see if it was possible to use 3 x 18650 batteries in a AR Drone 2.0.

So I made up a 3s pack using Panasonic 3400mah NCR18650B, these are rated for around a amp draw of around 6.7 amps constant.

I thought they may be borderline on the AR Drone as I recall there is a video around on youtube of a guy doing a test and that was showing the drone pulled about 7 amps on take off and so with the weight of the rc mod and flight recorder I did wonder about whether this would work.

Anyway….

3 of these weighed around 137 grams.

IMG_0998

You have to be careful where you buy these as there are many fakes around!!

Quickly made up a balance lead to charge the batteries and from new the resting voltage was 3.66 volts per cell.

IMG_0999

As I did not have a spot welder about to contact the batts together, I just roughed up the ends so solder would take and then quickly soldered them together. If you do it this way you have to use a good soldering iron and be quick or you going to cook batteries and that can lead to possible problems and even fire, so be very careful!!

From the resting volts of 3.66 per cell and doing a gentle charge at 100mah these batteries took 803 mins and 1337 mah to a full charge of 4.20 per cell.

Again I always charge new lipos gentle at first and this is just personal choice, no scientific reason really.

So popped them into the ar drone and see how they worked or did not work as the case may be.

First thing I noticed when I took off is battery went from around 98% left on the freeflight app to just under 50% almost straight away and I thought this does not look too promising.

Carried on the flight and landed the craft at 10% left after 6 mins 57 seconds.

Well it did fly, but I could already see the amp draw of the drone was too much for these batts.

Voltage at end of flight was around 3.88 per cell when read back.

So charged them back up and the pack only took 717mah back to a full charge of 4.20 volts per cell and so was obvious these batts cant handle the high drain needed

went for another try and this time I would I would land when the ar drone auto lands at 0% battery.

This is what I see and that was a flight time of 8 mins 10 seconds and the drone auto landed at 0% left. The batts reading at end of flight was 3.78 per cell and used a total of 843mah.

So although it did fly , these batteries did not fit the bill.

I did 1 final test without the Parrot GPS Flight recorder and got 9 mins 23 seconds……

I would not class this as a fail as the batteries were able to power the flight, and I am still impressed that 18650 batteries are getting close to being able to power a quadcopter and if you put 6 of these batteries in a 3s config and not too heavy quad will get better results.

But of course you cant do that on a ar drone due to weight and also space and tiny motors etc.

So moving on , my next test will be with some Samsung 25R INR18650-25R 2500mAh and expect better results.


Posted in AR Drone 2.0, Radio Control Models | Leave a comment