Wingsland S6 from Banggood

Always wanted one of these quads and Banggood was doing a good price on these , making it worth a try.
Even though many reviews online and on youtube are very negative on them.

Received mine after only about a week and a half, so really good service from Banggood.

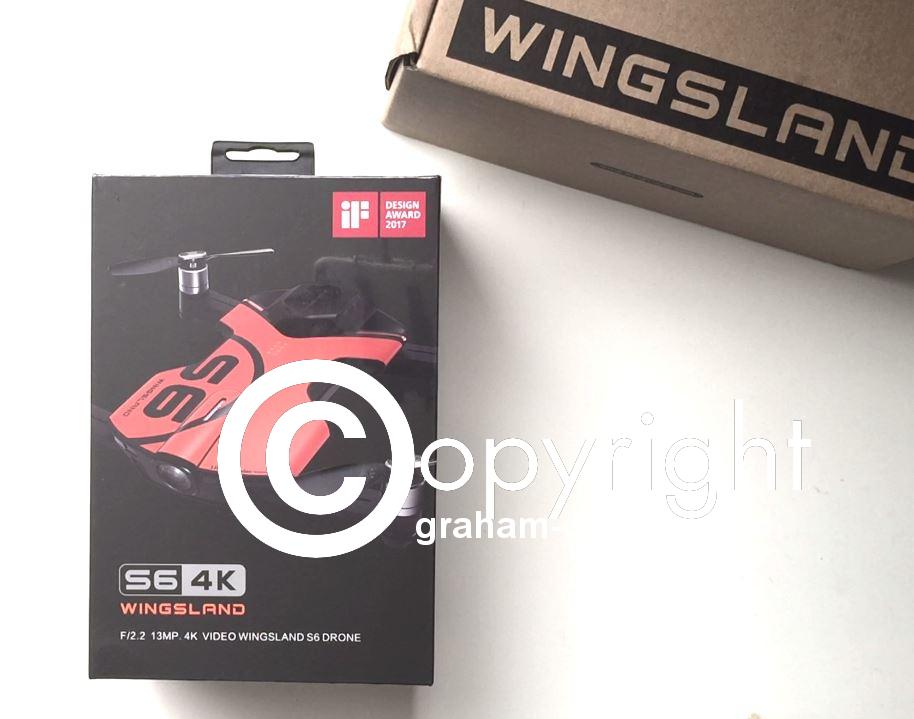
Box was not crushed and inside package was some foam around box and after removing that, there was the outside Wingsland Box and inside that, the actual Wingsland package. Glad they done that as its quite a way from Shenzhen China to the UK and packages no doubt get bashed about a bit on the way and so the good packaging was much appreciated.

In fact I wished more makers and sellers done this..

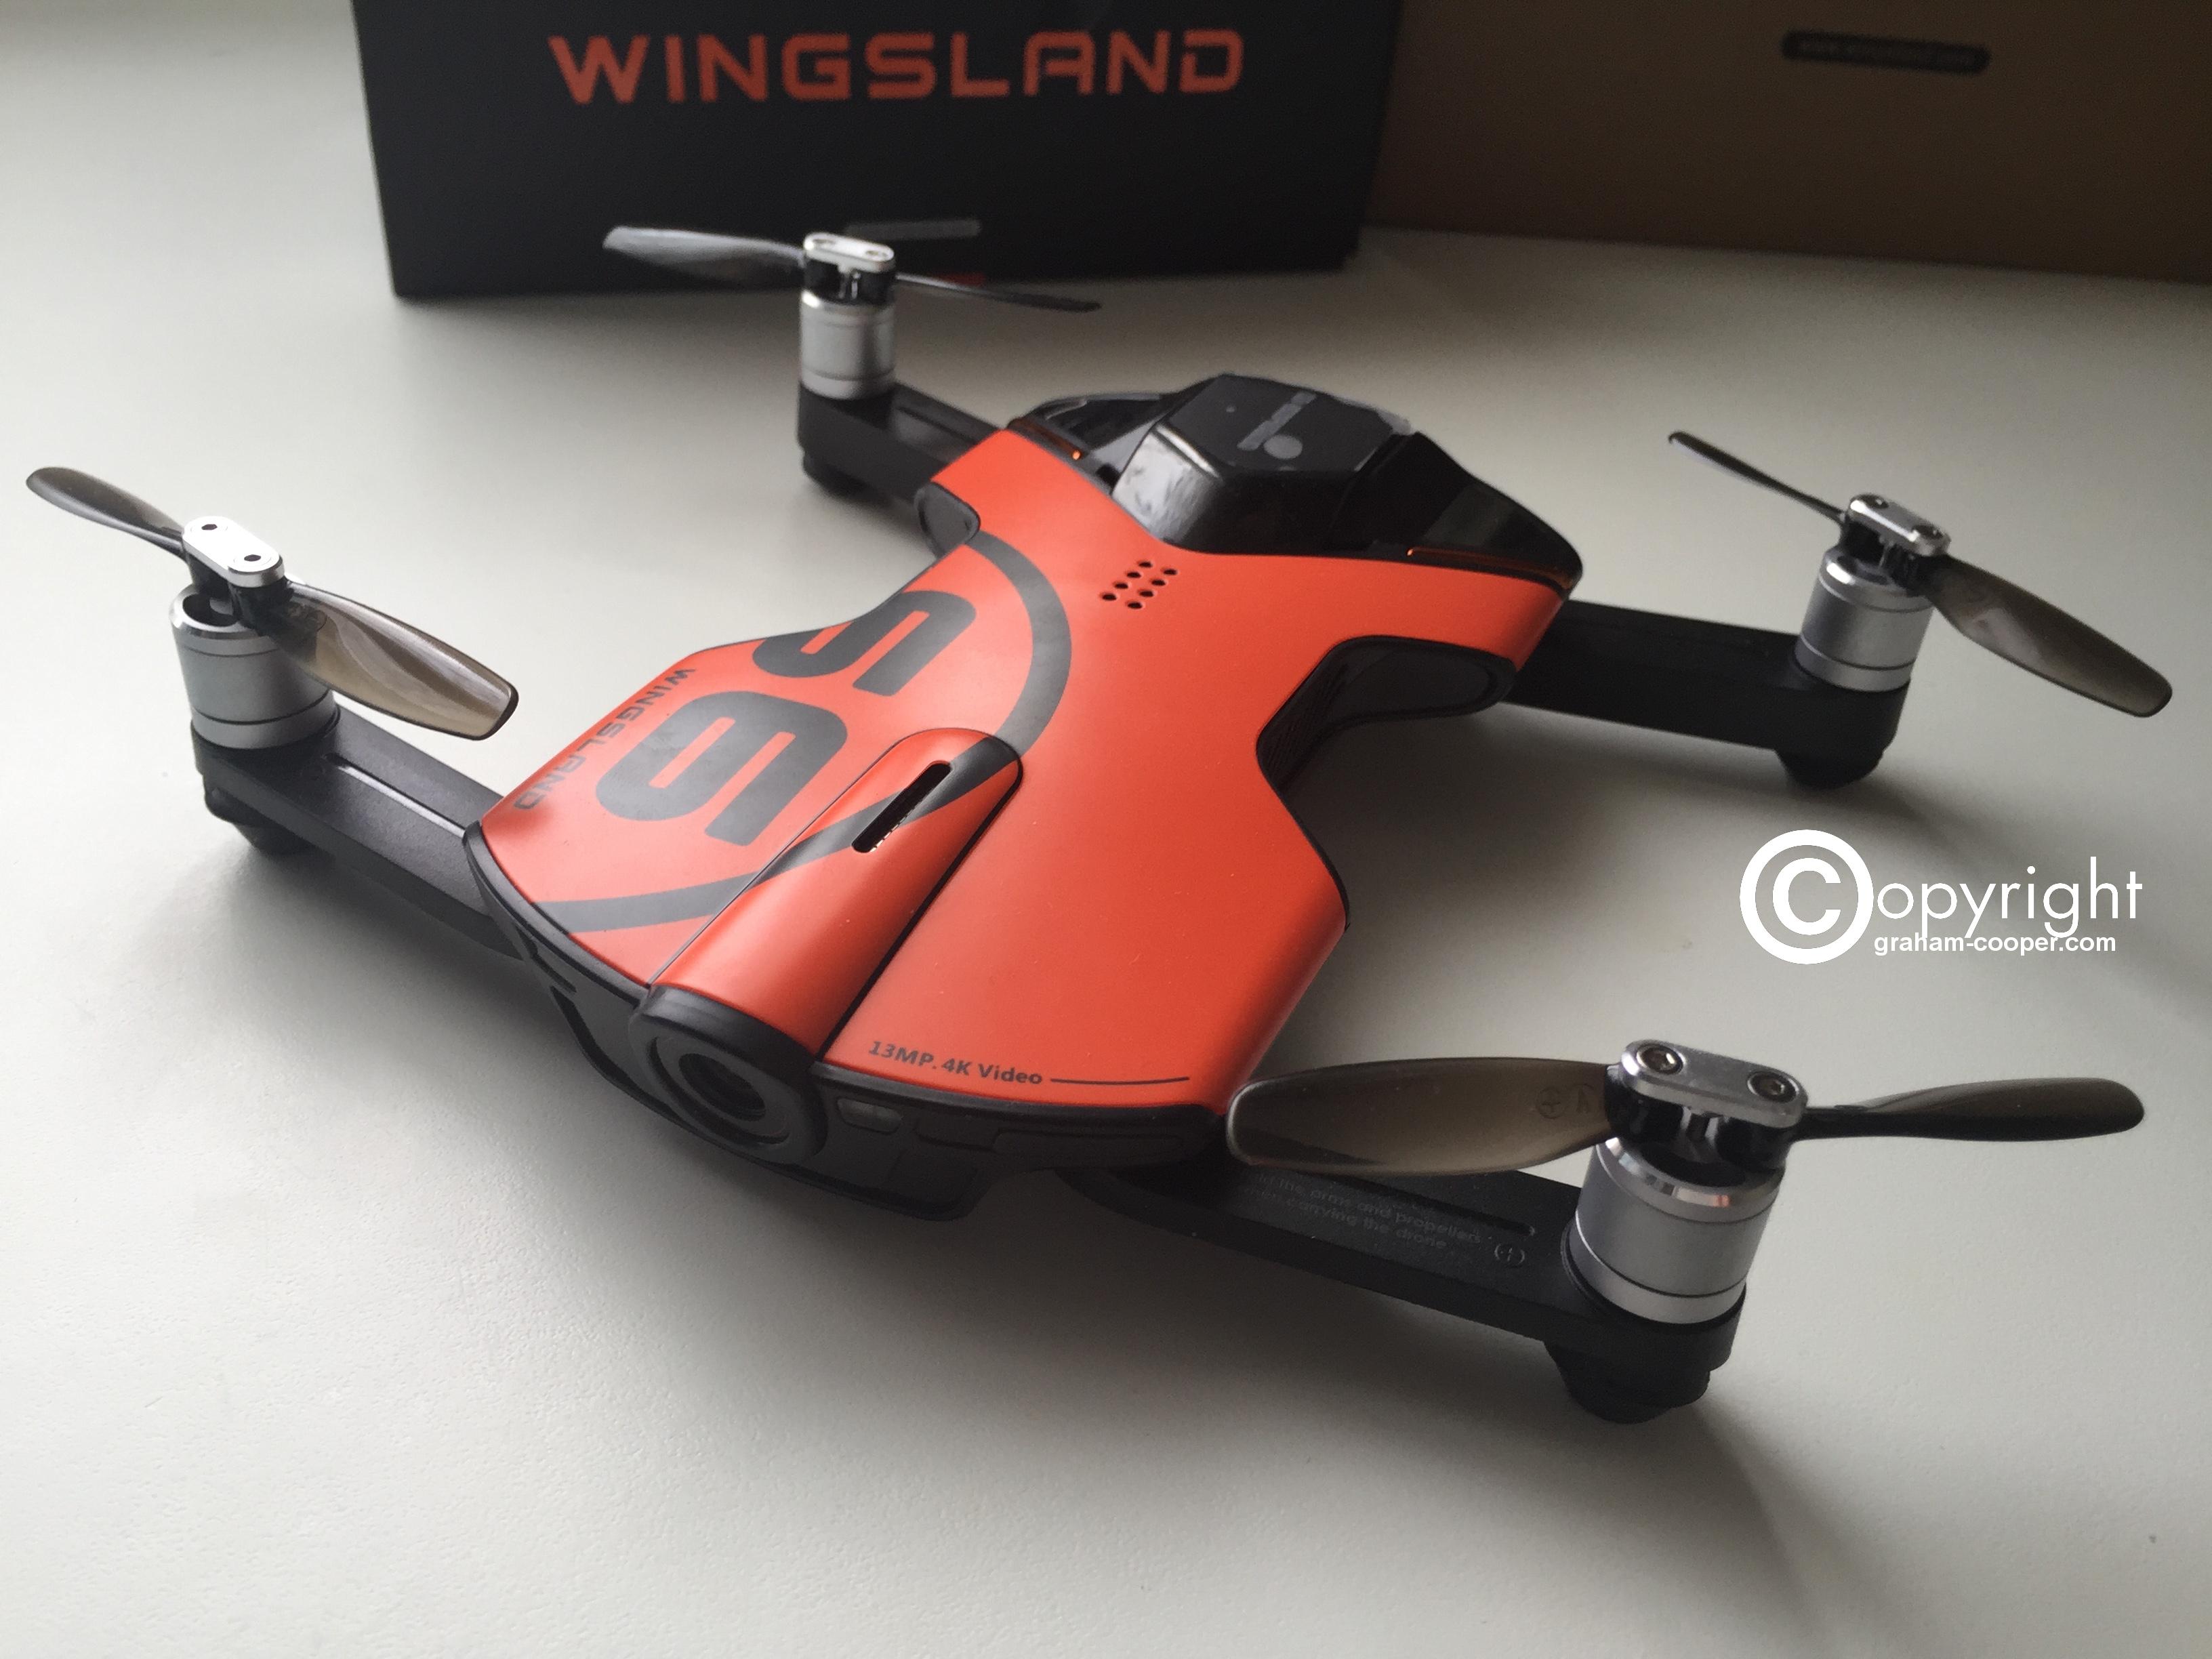
Only thing I noticed after removing the shrink wrap around box, on the inside on the Wingsland S6 there was no plastic film protecting the arms or any film on the camera and plastic strip around the manuals as was seen on some of the unboxing videos, and also the unit had fingerprints over it and a couple of marks on the body underneath.

So this makes me think that at this cheap price, maybe they are refurbished units.

The rest of the stuff inside was brand new in had wrapping and ties etc.

Still at the price and as long as it works ok, I am okay with that.

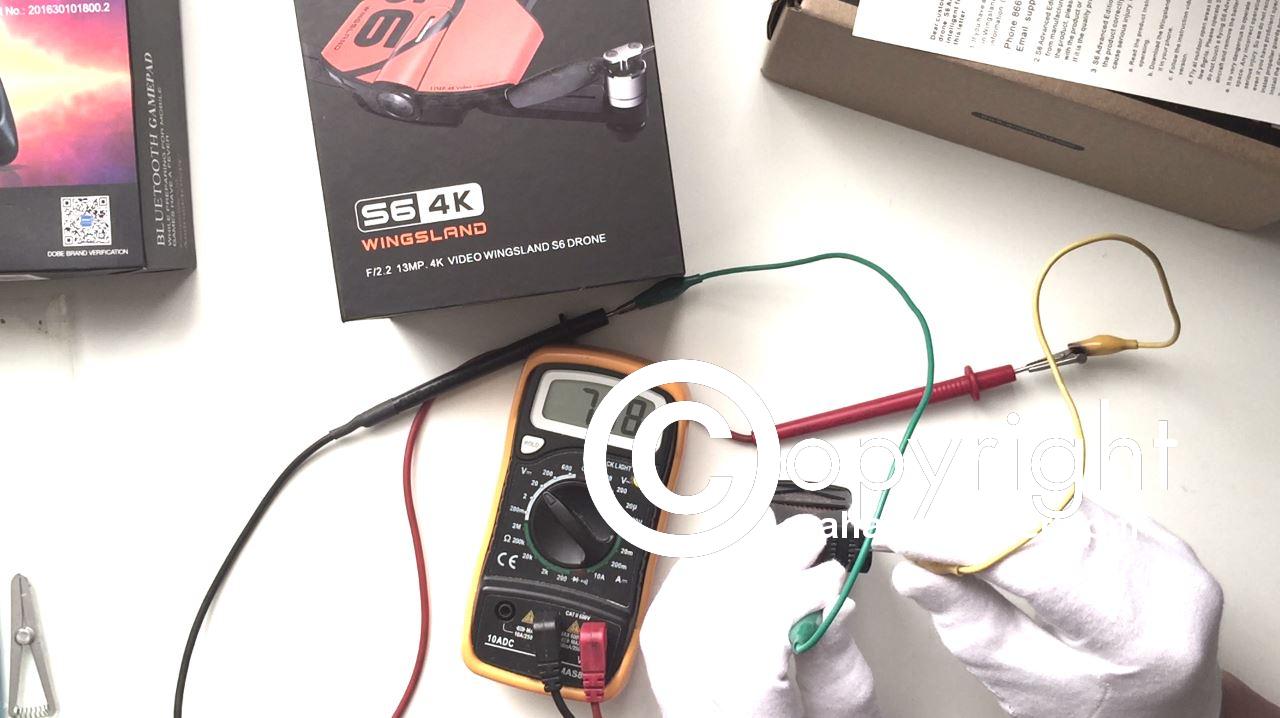
Bearing in mind a few of the reviews said the battery it comes with was no good, first thing I done was to use a meter and measure the shipped battery voltages.

Resting shipping voltage was 7.78 volts.

1st cell  = 3.88 Volts

2nd cell = 3.90 Volts

So pretty well balanced and no bad cell thus far

Then it was time to charge the pack and I charged from a computer usb 2.0 port so give a nice slow charge from the first one.

Took 1 hour and 20 mins and at the end I had:-

Fully charged pack = 8.78 volts

1st cell   = 4.35

2nd cell = 4.43

So that second cell seems a tad overcharged to me. Need to check that again on next charge, or could well end up with puffed battery.

These batteries are the LiHV type so hence higher voltage than normal lipos and for these I would expect 4.35 per cell giving a total of 8.70 volts not the 8.78 I have.

Anyway, after that fitted the battery and started up the app on my iphone.

Was greeted with this:-

And so hit the yes to update and there I run into first problem!

On the next screen it has no update button!!

There should be a orange upgrade button, but alas nothing and going back a page it still says update available.

I tried turning the phone, but app on that screen does not rotate as my guess was update orange button might be there, but wont fit on iphone screen.

Anyway, pulled out a old Android phone and tried the app on that and it went to update screen and showed the firmware update!

So seems to be a issue with ios11 and a iphone 6.

Maybe works fine on other models of ios? and maybe it works on a ipad with bigger screen.

I guess other way is to download the Quad S6 firmware from Wingsland’s site and put it on a SD card.

After the firmware updated it says update camera firmware and one needs to get that manually from Wingsland’s site and unzip the download and put the WingSland.bin file on a SD card and boot the quadcopter and it will update the camera firmware.

So then onto doing the calibration and I am now just waiting for decent weather to test.

So far, as others have pointed out the presentation of this quadcopter is first class, the packing etc was class. Except in my case what looks like maybe a refurbished unit, was the only downside for me.

I am also doing some videos on this, which I will update the post with.


Posted in Wingsland S6 | Leave a comment

Bebop 2 GPS Repair

Okay, now we have a working Bebop 2. Its now time to see if I can fix the GPS chip.
At present I am flying the Bebop with no GPS chip on it.:-

But I do have a not used anymore GPS that has the correct UBLOX chip on it so I used a hot air station to remove the chip.

The Original UBlox chip had a short on the 3 volt vvc line and that was why it was removed.

Takes quite a bit of heat to remove these by the way.

Anyway, removed it and soldered it back to the Parrot GPS board.

There is a small ic next to the gps board (more on that in a minute.)

(The white bit of plastic is just what I covered the barometer with and had a bit of foam inside to maybe help with altitude hold)

Fitted the board back to the Bebop and fired it up and no GPS still!

In the app where it should say GPS version it was just blank.

I figured it needed to use the correct Parrot GPS firmware as opposed to what was already in the GPS chip.

So tried flashing the firmware, hoping that would sort it out, but sadly still nothing.

So it occured to me, maybe if I swap out the winbond firmware ic in the ublox with the original chip off the shot circuit board it may work?

Original winbond chip read ok and no shorts.

One has to remove the shield on the UBlox chip to get to the winbond ic.

So I removed the original winbond chip from the new ubloc board and fitted the small firmware chip that is pictured above, and then refitted the shield.

Fitted the GPS board back and it worked!, and also it updated the GPS version.

Went for a quick test outside and it picked up about 16 satellites and worked no problems.

So yes with some patience and having a spare correct UBLOX gps chip around one can change it.

But if you need to buy the chip the cost and shipping makes it much easier and not much difference in price really to buy a new GPS board from Parrot.

This is really just a test to see if it’s fixable.

Considering this board been through salt water damage, I would not advise to do this and then relie on it when your Bebop is up high or away in distance as any other damage might show up and you will lose your device.

So if you attempt this and you lose your Bebop, you have been warned 😉

The best way is just to buy a new board!

A video I made about the repair and also test of some new LG HG2 Cells.


Posted in Bebop 2 | Leave a comment

Bebop 2 Repairs Continued

Well I had to say fairwell to the motherboard!

Sadly there was another short around the CPU area and the Power management chip had also failed on this board.

After removing the underfill around the chip, it was removed and there was some corrosion under the chip.

Sadly I had to give up on this motherboard as there was a good chance there was more damage with the remaining chips.

So I moved onto a spare board I had which was also faulty, but a very easy repair in that this other one just needed a new motor wire and a wifi sma plug soldered back onto the board, which was taken from the water damaged board.

So now onto putting the board back in the Bebop 2 along with the original water dipped main camera, motors , downward facing camera and gps board and motherboard fan.

On power up the red led on back just flashed and there was no motor esc sound or the board fan spinning.

To cut a long story , I found there was a short on the UBlox chip , the vcc power line was short to ground. Hence as the bebop needs to read the barometer from the gps board and it could not, the board would not boot.

So I did wonder what would happen if I removed the GPS chip?

So I removed the chip, and plugged the GPS board back into the bebop and it did indeed boot with the esc sound and also the motherboard fan spinning and going from flashing led to solid.

I could connect via wifi to the Bebop and the main camera was working fine!

I kinda felt that might be toast, but was working fine , as was the other original water dipped parts.

I then tried out a test flight which it took off and held hover via position hold from sonar and downward camera indoors well.

I was not sure whether with no GPS chip, it would work to be honest.

But I guess with no gps chip, the bebop just checks for GPS signal and with no chip it assumes inside with no satellites etc.

This test was also done with a mod I had done to the original damaged lipo cells and that was replacing them with 3 x 18650 Samsung 25R INR18650-25R.

For my next test , I tried outside and the flight time from 100% to 0% landing was around 14mins.

A video I made is below.

To to recap, to get this salt damaged Bebop 2 working again needed :-

full set of motor bearings

Main board

GPS board

Battery

So if one was buying new parts = uneconomical repair! Just buy a new one!

However……

I was lucky enough to have another faulty main board , but not to much effort to repair.

Also I am running the GPS board without the Ublox gps fitted.

My next steps with this will be to try to fix the GPS board and also test out some new LG 3000mah 18650 cells as a flight pack.

More soon.


Posted in Bebop 2 | Leave a comment

More Dead Parrot Bebop 2 continued

Well being a glutten for punishment, I have all 16 mosfets for the main board on there way to me. The postage and customs and UK VAT cost the same as the parts! As could not source them all in the UK.

Curious to see if replacing all these brings any of the board back to life.

Will update with progress or lack of when I get and fit them back 😉

Next while I am waiting as I will clean up the old ones to read on a meter see if any obvious internal shorts on the original fets.


Update:-

Tested the SIZ342 Power Mosfets and 4 of the original 12 are reading short circuit.


Posted in Bebop 2 | Leave a comment

Dead Parrot Bebop 2 continued

After slowly ramping up to a normal voltage of 12 volts to the board the mosfets down the bottom of main board got really hot, so must be a short there and most likely on the others too as well as maybe internal short on chips or through multi layered pcb.

So with a short on the main board and how badly corroded the mosfet area was, I decided to remove every mosfet!

1  Z342 missing from above photo, there should be 12 of those.


As you can see a lot of the above had a lot of corroded/Missing pads.

Once this was done , no short and connected the 12 volt input and nothing was getting hot.

Although with no power mosfets in , not much going around the board anyway.


A lot of corrosion on the pcb pads, maybe with some flux and tinning area can clean the pads back up without having to make jumper wires up 😉

(The 2 red wires were just in place of the normal lipo connector as this was weak not being in shell and also getting in the way to measure voltages etc)

The Motor pre driver chips of which there are 4 on the board are MPS MP6530 (Three – Phase Brushless DC Motor Pre – Driver)

And the other power mosfets which there are 12 of them seem to be Vishay SIZ342 (DUAL N-CHANNEL 30-V)

Best way forward now?

Use as spares…..

If I get bored , I might for a laugh get new mosfets and fit them back just to see if anything happens.

But with corrosion around wi-fi chips and other exposed chips , almost certainly replacing all the mosfets will not bring this back to life, just too far gone.

But intresting to see just how much damage will happen if electronics on a quadcopter like this will take if it lands in water, especially salt water as this one did and more so if just left to dry out.

Think twice if you ever offered a water damaged quadcopter, the machine will 9 times of 10 need at least a new main board at the very least….

I may use the shell with new bearings in the motors with something like a naze32 or pixhawk board in the future.


Posted in Bebop 2 | Leave a comment